개발 환경
항목버전
| Java | 17 |
| Spring Boot | 4.1.1 |
| Spring Framework | 7.0.9 |
| Gradle | 9.7.1 |
| QR 라이브러리 | ZXing 3.5.3 |
이번 포스팅은 Spring Boot로 QR 코드를 생성해서 이미지로 응답해주는 간단한 API를 만들어본 기록입니다. 텍스트나 URL을 입력하면 QR 코드 이미지(PNG)를 생성해서 돌려주는 구조입니다.
1. build.gradle 의존성
dependencies {
    // QR 코드 라이브러리
    implementation 'com.google.zxing:core:3.5.3'
    implementation 'com.google.zxing:javase:3.5.3'
}
QR 코드 생성을 위해 필요한 의존성은 zxing의 core, javase 두 개입니다.
- core: QR 코드 인코딩/디코딩 핵심 로직
- javase: BitMatrix를 실제 PNG 이미지 파일로 변환해주는 유틸리티 (MatrixToImageWriter)
2. QR 코드 생성 서비스
java
@Service
public class QrCodeService {

    // content: QR에 담을 텍스트, width/height: 생성할 이미지 크기(px)
    // 반환값: 완성된 PNG 이미지의 원시 데이터(byte[])
    public byte[] generateQrCode(String content, int width, int height) throws WriterException, IOException {
        // QR 코드 생성 옵션을 담을 Map (옵션 종류 -> 옵션 값)
        Map<EncodeHintType, Object> hints = new HashMap<>();

        // 에러 정정 레벨 M(중간, 약 15% 손상까지 복구 가능)
        hints.put(EncodeHintType.ERROR_CORRECTION, ErrorCorrectionLevel.M);

        // 문자 인코딩 UTF-8 - 한글 등 다국어 텍스트가 깨지지 않게 함
        hints.put(EncodeHintType.CHARACTER_SET, "UTF-8");

        // QR 코드 이미지 테두리 여백 두께
        hints.put(EncodeHintType.MARGIN, 1);

        // 실제 QR 코드 생성: content를 QR_CODE 형식으로 인코딩
        // 결과는 흑백 패턴 데이터(BitMatrix)이며, 아직 이미지 파일은 아님
        BitMatrix bitMatrix = new QRCodeWriter()
                .encode(content, BarcodeFormat.QR_CODE, width, height, hints);

        // 이미지 데이터를 메모리에 임시로 쌓아둘 출력 버퍼
        ByteArrayOutputStream baos = new ByteArrayOutputStream();

        // BitMatrix(패턴 데이터)를 실제 PNG 이미지로 변환해서 버퍼에 씀
        MatrixToImageWriter.writeToStream(bitMatrix, "PNG", baos);

        // 버퍼에 쌓인 PNG 이미지 데이터를 byte[]로 꺼내서 반환
        return baos.toByteArray();
    }
}
처리 흐름은 다음과 같습니다.
텍스트 입력
    ↓ encode()
QR 패턴 데이터 (BitMatrix)
    ↓ writeToStream()
PNG 이미지 (메모리 버퍼)
    ↓ toByteArray()
byte[] 반환
텍스트를 QR 이미지로 만드는 것
3. 컨트롤러
@RestController
public class TestController {

    @Autowired
    QrCodeService qrCodeService;

    @GetMapping(value = "/api/qr", produces = MediaType.IMAGE_PNG_VALUE)
    public ResponseEntity<byte[]> getQrCode(@RequestParam("content") String content) throws Exception {
        byte[] qrImage = qrCodeService.generateQrCode(content, 300, 300);
        return ResponseEntity.ok()
                .contentType(MediaType.IMAGE_PNG)
                .body(qrImage);
    }
}
GET /api/qr?content=텍스트 형태로 요청하면 PNG 이미지를 바로 응답합니다.
4. 테스트 방법
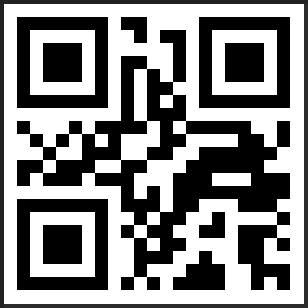
앱 실행 후 브라우저에 아래 주소를 입력하면 QR 코드 이미지가 바로 뜹니다.
http://localhost:8080/api/qr?content=hello휴대폰 카메라로 스캔해서 "hello"라는 텍스트가 인식되는지, 혹은 URL을 넣어서 실제로 그 페이지로 연결되는지까지 확인할 수 있습니다.
curl로 파일 저장해서 확인하는 방법도 있습니다.
5. 결과
마무리
ZXing 라이브러리 자체는 의존성 두 줄만 추가하면 될 만큼 간단했고,
다음에는 결제 시스템에서 쓰이는 동적 QR 코드(토큰 기반으로 만료시간을 두는 방식)까지 확장해볼 예정입니다.
'DEV > SpringBoot' 카테고리의 다른 글
| [SpringBoot] module java.base does not open java.lang 에러 (0) | 2023.03.20 |
|---|---|
| [SpringBoot] WebSecurityConfigurerAdapter 취소선 😀 (0) | 2023.01.10 |
| [SpringBoot] Execution failed for task ':test'. 에러 (0) | 2022.10.20 |
| [스프링부트] 롬복 Lombok 라이브러리 추가(Gradle Project) (0) | 2022.10.19 |
| [자바] 처음 설치하고 자바 버전 1.8로 변경하기 (0) | 2022.05.30 |